Contact data and member page
All members of the institute automatically receive their own member page, also called profile page. Here, you can put information about your own field of work, research interests or links to interesting lectures and results.
The member pages are linked at appropriate places on the website, e.g. the section pages, under Members or on project pages and news pages, if contacts are given there.
- Go to the members page and click on your name to get to your member page.
- Login with your AIP account. You can find the login link at the top of the page.
(This is the same account as in the intranet (= Windows/WLAN/Eduroam account). If you are listed on the employee list, then you also have such an active account).
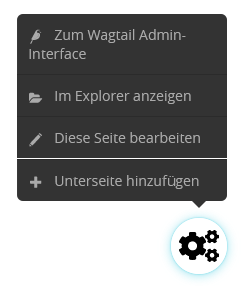
Click the 'Gears' icon in the lower right corner to go to the Wagtail admin interface, edit a page or add a child page to the current page.
- Click on the gear icon at the bottom right and on 'Edit page' to edit your page.
- In the 'Introduction' field you can enter a text in English and German, which will appear in the first section of the page next to your profile picture (if available). The profile picture is customized in the account settings (see next section).
- Add more text, pictures, etc. in the area below. The available blocks are the same as on a standard page, see also the documentation pages on images and links.
- You can also add more subpages to your member page and display a navigation menu for your subpages.
- Publications:
- If there are publications from you in the website database (queried by the ADS and updated nightly), the most recent 10 publications are displayed on the page.
- If you maintain an ADS library with your publications or have an ArXiv link to your publications, you can enter them under 'Account settings' -> 'Publication settings'. They will then also be displayed on the member page.
- You can switch off this automatic display of the most recent publications and the ADS/ArXiv link by unchecking the corresponding option under 'Publications' on the member page.
Customize profile picture (account settings)
- After logging in, go to the Wagtail Admin Interface by clicking on the gears icon in the lower right corner.
- Click on the small arrow next to your name in the lower left corner and then on 'Account settings'.
- Click on 'Set Your Profile Picture'.
- Select a profile picture or edit the current picture. If you click on 'Edit', you can also define the focus of the image, e.g. to place your face centrally. If you have troubles with that, e.g. because too much of your face is cropped, you can also cut the imagebefore uploading it with an external program (e.g. Gimp) to a square format and replace the current picture.
- If you don't want a profile picture to be displayed, remove the link to the profile picture with 'Delete selection'. The image will then no longer appear as a profile image. If it is not needed anywhere else on the website, you can also delete it.
- Delete image completely:
- Go to the 'Pictures' menu on the left side of the admin interface.
- Find the picture you want to delete and click on it. You are now in edit mode of the image.
- Click on 'Delete image' at the bottom and confirm the request with 'Yes'.
- If you are still missing a suitable picture, you can also contact the members of the press and public relations section, they will be happy to take a photo of you on the institute campus.
Adjust additional contact information (account settings)
General contact data such as office, telephone number and E-mail address are stored centrally in the IT user database and are synchronized from there. If you find any discrepancies, please contact support@aip.de or webmaster@aip.de.
Additional data such as a public fax number or an alternative E-mail address (e.g. finanzen@aip.de) can also be set by you:
- After logging in, go to the Wagtail Admin Interface via the gears icon on the bottom right.
- Click on the small arrow next to your name and then on 'Account Settings'.
- Click on 'Set public contact details'.
- Fill in what you need.
- Click 'Update' to save your changes.